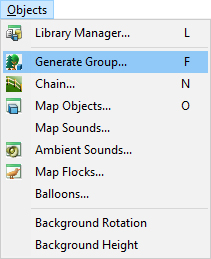
To create a group of trees of specified species, scale and density, in area inside of a boundary curve, use Generate Group command. This command can be used also for generating groups of other objects from Objects libraries.
You have following possibilities to launch Generate Group command:
- From Objects drop down menu select Generate Group
- Using icon from the toolbar

- Using keyboard shortcut: F

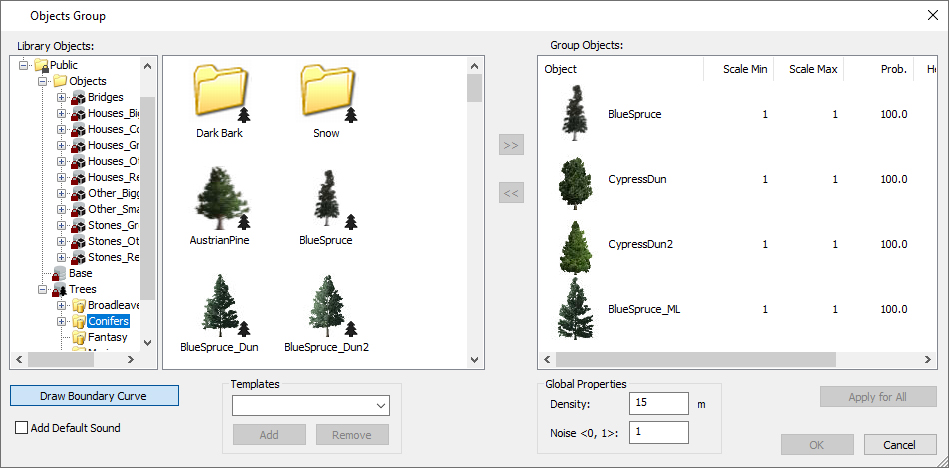
When Generate Group command is launched the Objects Group dialog is opened and Draw Boundary Curve is already activated. Move cursor in terrain and pick several points to create a curve.
To finish creating the curve choose Finish from right mouse click context menu.

Hint:
It is recommended to use top view while creating the curve to easily gain the desired shape of the boundary curve and point positions. To see the curve in side view be sure that in Visibility Filter the Curves in side view item is activated.
Hint:
It is recommended to use more groups with the same combinations of trees around of golf course, but with always.
Library Objects browser is in the left part of dialog. Choose a needed tree species and double click on it to assign it to the forest vegetation in the right side. Or use >> button in the middle of dialog to add the tree to the forest. To remove tree from the forest doble click on the tree’s icon in the list at the right side of dialog, or use << button.
For each tree in Group Objects set minimal and maximal size scale and its probability value, the minimal and maximal height. The higher Prob. value the higher amounts of trees of the species in forest. In Density field set an overall forest density value. The density number represents distance between two adjacent trees. The higher is the value, the fewer trees will be placed in the forest. Noise parameter affects layout of trees in the forest. Use zero value to place trees in regular pitch (to create an “orchard”), use value 1 to create totally disordered layout of trees (to create forest).
Hint:
To use same scale and Prob. values to all trees in forest, select the tree (which values should be used) and click Apply for All button.
Hint:
Hover cursor above the group object so, that the object gets highlighted, press right mouse button and from the context menu choose Generate Group From command to create a new group using properties of the selected one.
Hint:
It is recommended to generate some forests around the holes at first with trees chosen for the golf course and then use Ctrl+Drag to copy freestanding trees of different variants, rotations and scales to exact positions at holes.
Hint:
If you need some kind of trees e.g., behind of green, for example pines, oaks and some shrubs – generate at first group from them somewhere to the middle of fairway, drag or Ctrl+Drag them to their positions where you need it and then delete the group. Each tree copied or moved out of the group boundary doesn’t belong to group any more.
Hint:
To use same settings of Group Objects in the future, write templates name to the Templates edit field and press Add to create template of Group Objects.
Note:
High density of small trees, shrubs or flowers can cause performance problems.
