
To create a lake, use Create Lake command.
You have following possibilities to launch Create Lake command:
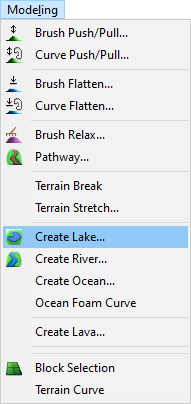
- From Modeling drop down menu select Create Lake
- Using icon from the toolbar

When Create Lake command is launched move cursor in terrain and pick some points to create a border curve of water table.
Hint:
It is recommended to use top view while creating the curve to easily gain the desired shape of the boundary curve and point positions. The curve should be created deep enough inside the shores of the lake so that the edges of the water are not visible.
Hint:
Use right mouse click context menu to edit the curve during creation.
Note:
Make sure that item Water Surfaces in Visibility Filter is on to see water tables in top or side view.
To finish creating the curve choose Finish from right mouse click context menu or press Enter.
To move the lake to desired height select it and from right mouse click context menu select Object Height command.
To edit created lake, make sure that item Water Surfaces in Selection Filter is on to be able to select water tables in top or side view.
Hover cursor over it so, that it gets highlighted and from the right mouse click context menu choose:
Lake Shape – to modify border curve of the lake.
Lake Properties – to edit lake water properties.
Object Height – to modify height of the lake object above the terrain.
Add Sound – to add a sound to the lake object.
Note:
The sound of the water waves is usually (and as default) not added to the lake object itself but to the water material curve. This ensures better uniform volume of sound around the whole water object.
Delete Object(s) – to remove the lake object from the map.
When Lake Properties command is launched the Lake Properties dialog is opened where you can set the lake water properties.
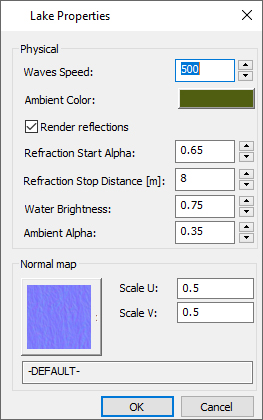
Waves Speed – to define an appropriate waves speed.
Ambient Color – click the button to open color palette and choose the desired ambient color of water table.
Render reflections – activate this checkbox to allow to switch off the reflection of surrounding objects like hills, trees, clouds etc. in the lake surface. This increases performance of the scene rendering.
Refraction Start Alpha – to set the refraction of water surface where 0 means reflective and value 1 transparent water surface.
Refraction Stop distance – to set the distance of water surface for reflection.
Water Brightness – to change the brightness of water surface.
Ambient Alpha – to set the intensity of ambient color where 0 means low and value 1 high effect.
Scale U and Scale V – to change size of waves in both directions. The values 0-1 are meaningful.
Hint:
To see how the current setting of lake properties (e.g. waves speed and waves shape) looks like, go to View menu and turn the toggle Play on.
