To create ocean in terrain, use Create Ocean command.
You have following possibility to launch Create Ocean command:
- From Modeling drop down menu select Create Ocean
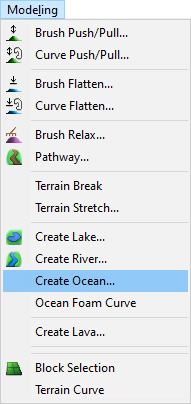
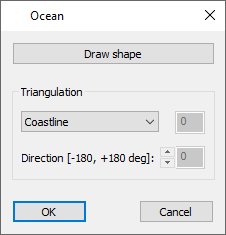
When Create Ocean command is launched the Ocean dialog is opened and Draw shape is already activated. Move cursor in terrain and pick points to create a border curve of water table.
Triangulation – set the shape of waves. From drop down list select the appropriate option, Coastline, LOD, Triangle size, Square size.
Direction – set the direction of waves.
To confirm and finish the Create Ocean command click the OK button or press Enter.
Select ocean object and use right click menu command Object Height to place the water area to desired height for good continuation to coast.
To finish creating the curve choose Finish from right mouse click context menu or press Enter.
Hint:
It is recommended to use top view while creating the curve to easily gain the desired shape of the boundary curve and point positions and be able to click points also out of terrain area.
Hint:
Use right mouse click context menu to edit the curve during creation.
Note:
Make sure that item Ocean Curves in Visibility Filter is on to see water tables in top or side view.
When Ocean Properties command from right mouse click context menu is launched the Ocean Properties dialog is opened where you can set the water properties.
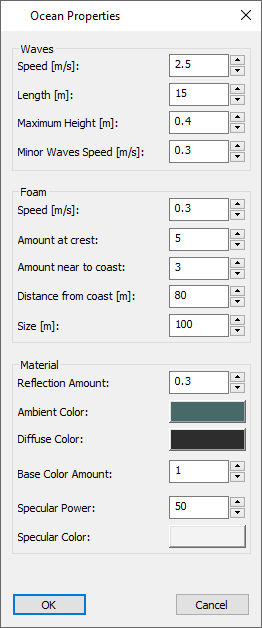
Waves – set the waves properties as Speed, Length, Maximum Height and Minor Waves Speed.
Foam – set the foam properties as Speed, Amount at crest, Amount near to coast, Distance from coast and Size.
Material – set the properties for the material of water.
Reflection Amount – set the reflection of water surface where 0 means low and value 2 high effect.
Ambient Color – click the button to open color palette and choose the desired ambient color of water table.
Diffuse Color – click the button to open color palette and choose the desired diffuse color of water table.
Base Color Amount – set the amount of the base color of water surface where 0 means low and value 2 high effect.
Specular Power – set the specular power of water surface.
Specular Color – click the button to open color palette and choose the desired specular color of water table.
To confirm changes, click the OK button or press Enter.
Hint:
To see how the current setting of Ocean properties (e.g. waves speed and waves shape) looks like, go to View menu and turn the toggle Play on.
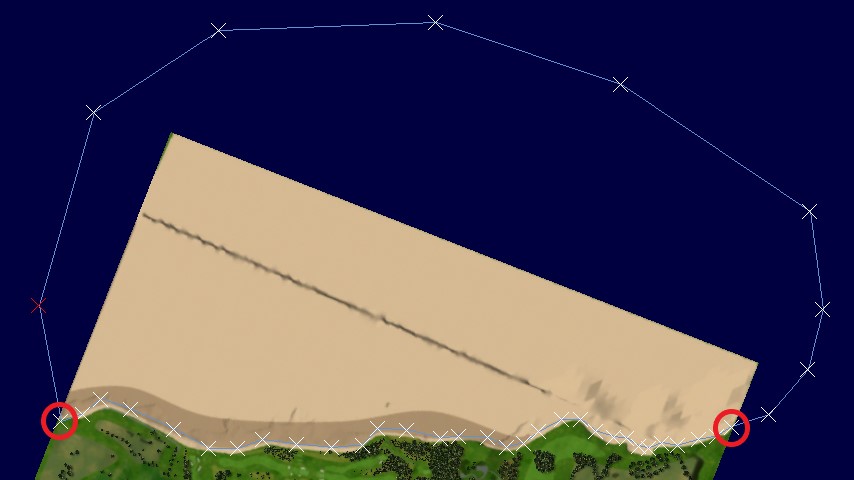
Example of ocean curve for coastline case. It is good to enter some points near of coast (marked by red) to keep foam only near of coast:
After applying right click menu Object Height command:
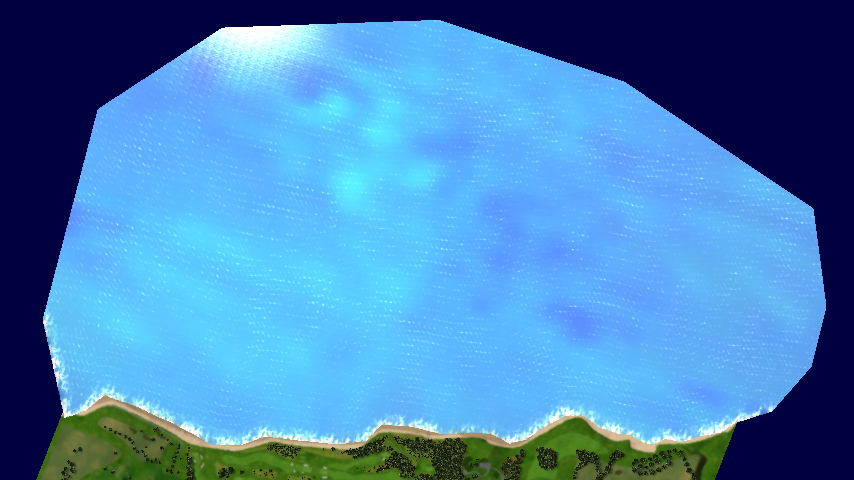
It is good to switch off selection of Water surfaces in Selection Filter dialog not to highlight the water surfaces any time when cursor is moved above a water.
