To flatten terrain inside of curve to one average height, use Curve Flatten command.
You have following possibilities to launch Curve Flatten command:
- From Modeling drop down menu select Curve Flatten
- Using icon from the toolbar


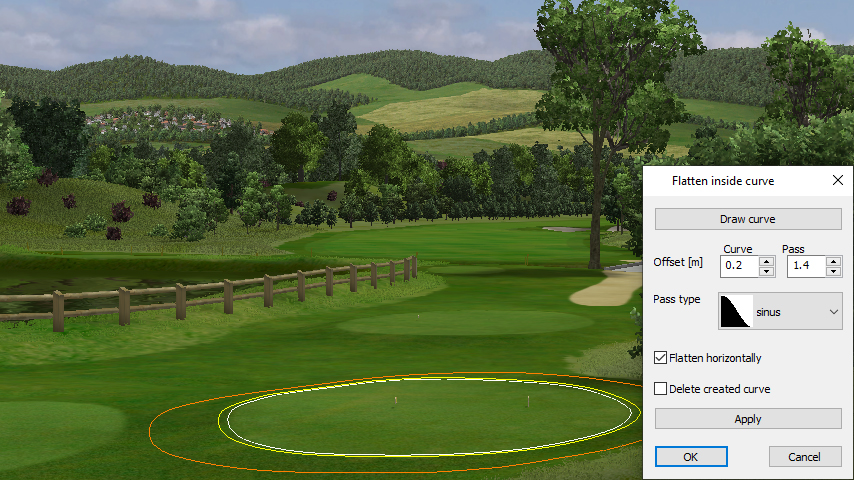
When Curve Flatten command is launched the Flatten inside curve dialog is opened and Draw curve is already activated. Move cursor in terrain and pick several points to create a closed curve.
Hint:
Use right mouse click context menu to edit the curve during creation.
To finish creating the curve choose Finish from right mouse click context menu or press Enter.
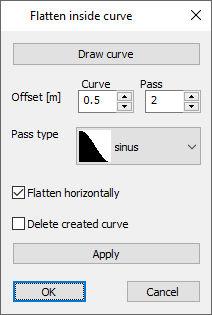
Offset Curve – set offset distance from the curve to specify boundary of the area, in which the terrain is fully affected (the terrain inside the offset curve is pushed /pulled by the full height value).
Offset Pass – this value specified an outer boundary of pass area. Inside the pass area the terrain is still affected by the flatten, but the influence changes by 100% (at inner border) to 0% (at outer border).
Pass type – from the drop-down list select sinus or linear pass between modified and unchanged terrain.
Flatten horizontally – activate this checkbox if you want to apply the flatten horizontally.
Delete created curve – If the curve was created during the command activate this checkbox if you want to remove the created curve from the map after the change.
Apply – use this button to apply the changes.
Note:
You can also run the command by using of existing curve. Hover cursor over an existing terrain / material / camera or forest boundary curve, right mouse click and from the context menu choose Apply flatten. In this case the Draw curve button is disabled in the dialog box.
To confirm and finish the Curve Flatten command click the OK button or press Enter