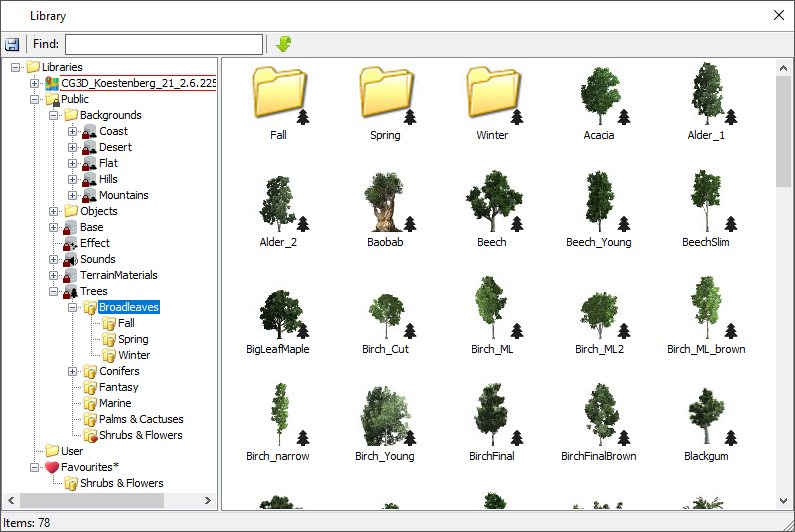
To open the library with objects, trees, textures and sounds for multiple insertion to maps, use Library Manager command.
You have following possibilities to launch Library Manager command:
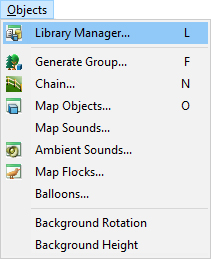
- From Objects drop down menu select Library Manager
- Using icon from the toolbar

- Using keyboard shortcut: L
When the Library Manager command is launched the library with objects, trees, textures and sounds is opened. Expand library tree and locate the desired object in right side of Library manager window and by pressing the left mouse button drag the object from Library manager window into the map and drop it on the desired position in terrain.
Hint:
Use Ctrl+drag to copy any object in the map. Remember that the Object move enabler should be turned on.
Note:
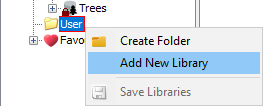
After the first run is install only base library. For more libraries push green button Download / Update Libraries ![]() in the top of Library dialog.
in the top of Library dialog.
In the top of Library dialog is possible to search objects according name. Fill name of object to the edit field and press Enter.
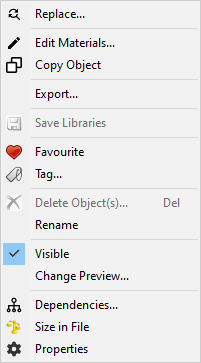
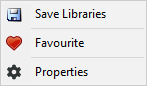
After changing object in the library save the libraries on the right click mouse button and select Save Libraries.
Click the right mouse button on the object (folder) and set Favourite.
Object (folder) is set in Favourites as frequently used object (folder).
To remove object (folder) from Favourites library select object (folder) in Favorites library and press the right click mouse button choose Remove Favourite.
In the Properties are shown object information’s the name, ID number, size and location of library.
Note:
In public version of editor is possible to edit only User libraries. The rest of them are read only. To import user objects, it is better to create your own tree in the User Library.
Import a mesh file into User Library:
To import a mesh file into User Library launch Library manager.
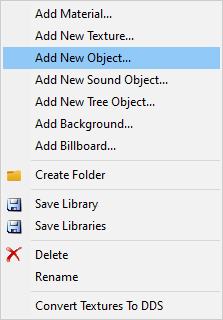
In tree or list view, right click on chosen folder to show context menu with several options.
Select Add New Object…, and use the file browser to locate the file you want to import.
Note:
Supported file formats for mesh objects are ‘Autodesk FBX’ and ‘Wavefront OBJ’.
The Mesh Import Options window opens. Set the options you want and click Import.
If some errors occur during the import, the pop-up window reports them at the end of the process.
Note:
The importer combines the contents of the file into a single mesh object, and gives the object the same name as the file (without the file name extension).
Scale – determines the scaling for the contents of the file on import. All verticies of the incoming model are scaled relative to world origin: (0,0,0).
Model Units – here you can specify the scale factor by choosing predefined unit used in the original file.
Note:
Our application works internally in metres. So if left default, scale factor will be 1.0, and no scale conversion will be applied.
Object Scale – actual scale factor applied to incoming data.
Axis Conversion – here you can specify the axis of the incoming model it uses for up direction. The object will be rotated to match its vertical axis with up axis in host application.
For height from terrain surface use – to easily place and manipulate an object on terrain surface we use object’s terrain height parameter. It is a vertical distance between terrain surface and some object’s point (generated, if necessary).
The options for object’s reference point are:
- center point of boundig box’s bottom face
- intersection point with horizontal plane at pivot height
- object’s pivot point
Note:
If no intersection exists, pivot point is used.
Info – displays total number of faces, meshes and materials the resulted object will have, as well size of the object after set scale and axis conversions applied.
Materials – here you can set texture data for each material found in imported model.
Textures – every material can use none, one (selected in Base map combobox) or two textures (second one selected in Light map combobox).
The combo boxes are populated with all texture file names referenced in selected material.
The texture files need to be present in imported object’s folder or its parent’s “textures” subfolder. Otherwise the import is canceled.
Texture alpha chanel – specifies how to interpret the alpha channel values of the textures during rendering. Available only when some texture selected.
- Don’t use – The values are ignored. It’s the default.
- Use for transparency – The values are used in blending operation, which combines object’s rendering output with already rendered scene.
- Use for masking – Pixels with alpha value lower then some threshold are rejected, not rendered. The threshold can be set in Mask threshold edit box.
Mask threshold – 1 byte value against which alpha values will be tested [0-255].
Note:
To import a mesh file with lightmap should be main texture in Diffuse Color layer and lightmap texture should be in Ambient Color layer with Map Channel setted on 2. Lightmap shoud be in Uvw mapping mapped in 2-nd channel.
To edit the imported mesh object hover cursor above the object, so that the object gets highlighted, press the right mouse button and select your choice. (Replace, Edit Materials, Copy Object, ………).