To create new material curve, use Material Curve command.
You have following possibilities to launch Material Curve command:
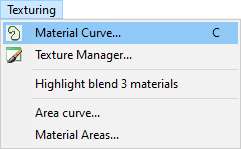
- From Texturing drop down menu select Material Curve…
- Using icon from the toolbar

- Using keyboard shortcut: C
Note:
Material curves are closed curves which define areas with different material. Area without any material curve has the Default material.
The material curves are defined for more reasons:
- Texturing – area with the same graphical texture (appearance) of the terrain.
- Golf Ball rolling and bouncing parameters. Each predefined material has different physical properties
- Generating of red or yellow sticks around the Water barriers
Any material curve can be used for one, two all or all three these reasons. - Generating of grass inside of material curve.
When Material Curve command is launched the Material Curve dialog is opened and Draw Curve is already activated. Move cursor in terrain and pick points to define a curve in terrain, enclosing a desired area with specific material properties.
Hint:
It is recommended to use top view while creating the curve to easily gain the desired shape of the boundary curve and point positions. To see material curves in side view be sure that in Visibility Filter the Curves in side view item is activated.
To finish creating the curve choose Finish from right mouse click context menu or press Enter. Now the material curve properties Material and Priority are available.
Hint:
While in the dialog, you can anytime return to draw curve mode. Press the Draw Curve button and edit the curve.
Set the desired material type, priority, stick color and texturing values and click OK to confirm settings.

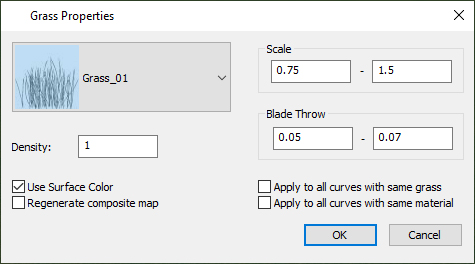
Grass – can be added to any material curve. Usually is added to the curve with Deep Grass material. Do not intersect the curves with grass by other material for fluently reduction of grass polygons near the curve. Hover cursor over a curve so, that it gets highlighted. Right mouse click at the curve and from the context menu choose Add Grass. In the Grass properties dialog choose the desired grass type from available list. Set appropriate grass properties. Click Ok to confirm changes. To edit grass properties hover cursor over a curve with some grass assigned so, that the curve gets highlighted. Right mouse click at the curve and from the context menu choose Edit Grass.
Material – The selected material type affects physical properties of the area enclosed by material curve in terrain. For example, a bounce of a ball from asphalt will differ from the bounce of the same speed and direction from a sand bunker.
Note:
In case it is the first curve with given material in the map use Texture Manager command to assign the texture to the material and type of pass.
Hint:
To update the terrain texture inside the material curve to reflect changes in material properties, go to Terrain menu, choose Update Map and use Apply materials to Terrain from available options. The update Map command also generates the red / yellow sticks along the curve.
Priority – The value specifies which material is displayed in case that an area in terrain belongs into two or more different material curves. The higher number represents the higher priority of the material curve.
For example, a small material curve green with the priority 20 is fully placed inside the material curve fairway with priority 10. After Update Map the green material texture is visible, because of the higher priority assigned to its material curve.
Hazard Type – Choose Red, Yellow or Blue hazard type if the material curve surrounds the area of hazard. It is possible to overlap more hazard curves, ball is in the game placed at the outermost curve. The Priority has no influence on the hazard. Once a curve is marked as hazard, the game takes it into account.
Autodrop – Switch on the check box to define hazard without penalty.
Stick Color – Change Hazard Type to Red, Yellow or Blue to make the option Stick Color available. Choose Red, Yellow or Blue to generate sticks of the selected color in regular distances along the material curve. It is possible to overlap more hazard curves, sticks are generated only at the outermost parts of curves.
Even if the curve surrounds a hazard, it is sometimes better not to generate sticks automatically, but rather to insert them later manually as objects from library – for example, if sticks are in reality only at some side of a water, even if whole water is hazard.
Hint:
To create hazard and sticks along a curve anywhere in the terrain, even across an area of more different materials, use material curve without texturing.
Autodrop – switch on this check box if material curve defines area, where is no possibility to play from. It can be Ground under repair or bio zone.
Texturing – Activate the checkbox to use the curve also for the different graphical appearance of the enclosed terrain. The material texture and pass properties are defined in Texture Manager command for all curves of given material and group. If the checkbox is active, option Group is available.
Group – enables to assign more than one material texture and/or pass properties to the selected material type. For example, a material type asphalt may have defined e.g. 3 groups: A – red asphalt, B – black asphalt, C – green asphalt. Physical properties of all groups A, B and C are same (asphalt material type), but their graphical appearances differ according to assigned material texture, type and width of pass, blur, alphamap density etc. See Texture Manager command.
Click in the Group box and select a letter from available list. If the group properties already have been specified in Texture Manager, they are populated in the bottom part of the material curve dialog box.
Edit Material Curve – to edit created material curve hover cursor over the material curve so, that it gets highlighted and from the right mouse click context menu choose Edit Material Curve command. Now the Material Curve dialog opens and you can make any changes in material curve properties or click the Draw Curve button to edit curve points.
If you want to edit only the curve shape, you can use Edit Curve command from right click menu.
The best way how to edit curves is to switch on the grip move enabler: ![]()
Then select the curve to became blue and move appropriate grip point to a new position.
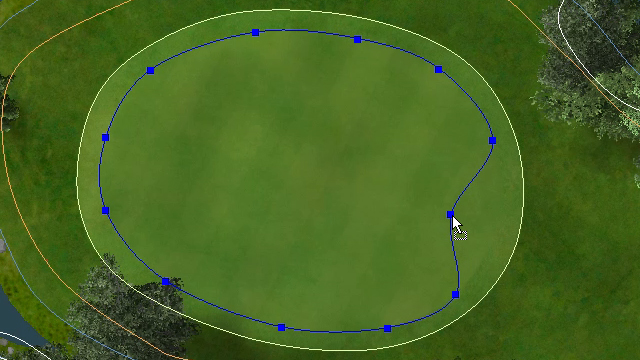
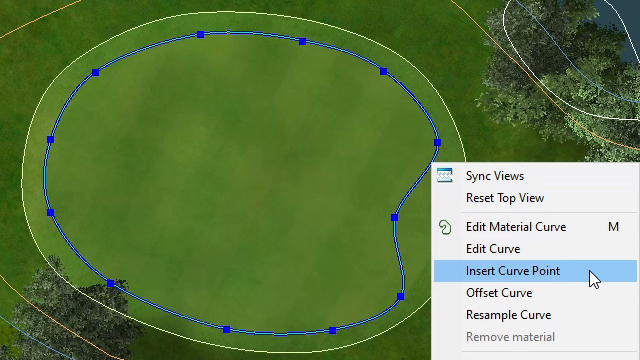
To insert new grip point, hover cursor over the selected (blue) material curve at the position of new desired grip. Press right mouse button and choose Insert Curve Point from right click menu.
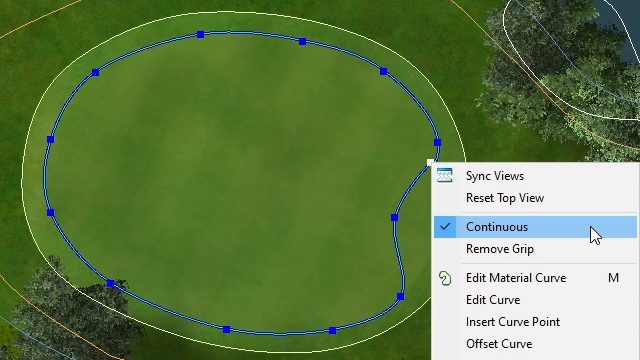
To delete grip point, select the grip point and choose Remove Grip from right click menu:
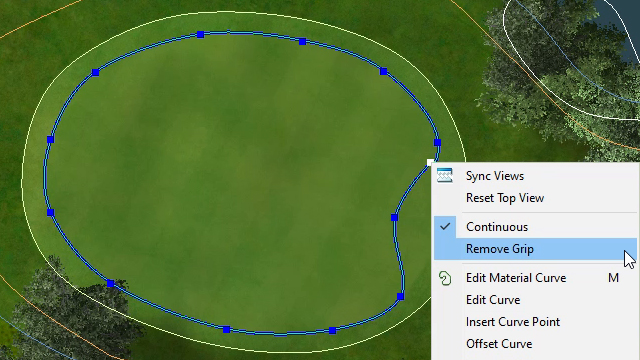
To change smoothness of curve at the grip, select the grip and switch on or off the Continuous check box in right click menu: