
To create new hole in the opened map, use New Hole command.
You have following possibility to launch New Hole command:
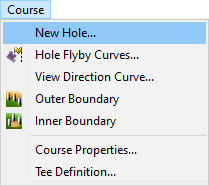
- From Course drop down menu select New Hole
When the New Hole command is launched the Hole dialog appears.
Hint:
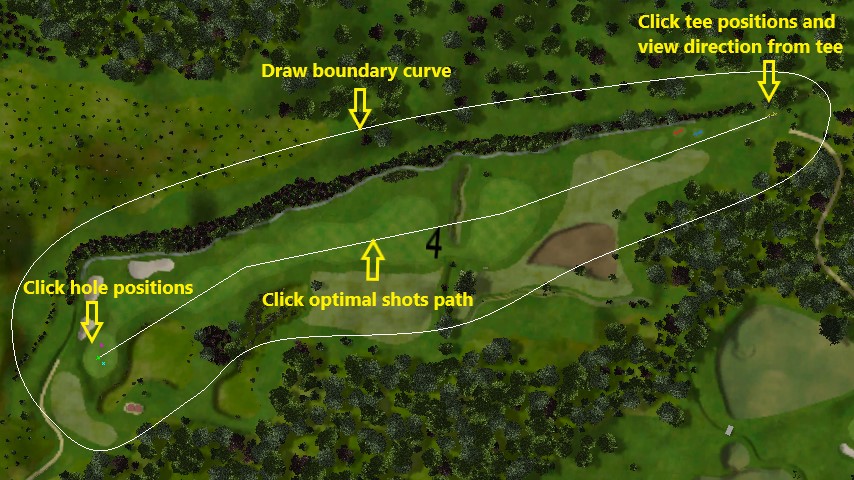
It is recommended to use top view when create a new hole to gain the desired shape of boundary curve and to specify precise tee and flag positions. For defining new hole in side view, in Visibility Filter activate the item Curves in side view.
Obvious properties are Boundary Curve, Easy Flag Position, Professional and Lady Tee Positions. OK button is disabled if any of these properties is missing.
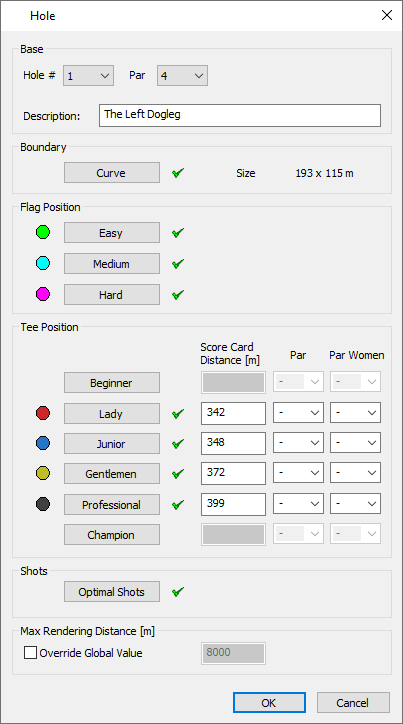
Hole # – To choose the hole number click the arrow at the right side and select the appropriate number from the drop-down list.
Note:
A hole in the map must have its specific hole number unique in the map. The playable single courses should be then defined in the Course Properties dialog.
Par – Click the arrow at the right side and select the appropriate par value from the drop down list.
Description – You can write a short description or a hole name in the editable field. This description is optional and it is displayed during the FlyBy in the Course Viewer.
Boundary Curve – Click on the button Curve and pick points of a closed boundary curve in terrain. Right mouse click in the terrain and use Finish from the context menu or press Enter to finish creating of the curve. Boundary curve is used to define Top View area in Game.
Note:
You can return to editing of the boundary curve any time in the dialog by clicking on the Curve button.
Flag position – Click on the Easy, Medium or Hard buttons and pick points in terrain for easy, medium and hard flag positions. Medium and Hard flag positions are optional and mostly for the simulator usage.
Note:
Buttons Easy, Medium and Hard are disabled while there is no boundary curve specified for the hole. You can edit flag positions any time in the dialog by clicking on the appropriate button.
Tee position – Gentlemen tee position is required for each hole in the map. Click on the Gentlemen button and pick the desired position in the terrain. Other tee positions are optional and their buttons are disabled by default while Gentlemen position is not specified.
The Score Card Distance, Par and PAR Women are optional inputs.
If Score Card Distance is entered, this value is displayed in the game when player is starting hole from the tee.
If Par or Par Women is entered, this value overrides general Par defined on the top of dialog for given tee and player’s gender.
Note:
Tee position should be placed inside a tee material curve, although editor allows to position it anywhere in terrain.
Optimal Shots – For holes with Par value greater than 3 shots click the button Optimal shots and drag cursor from professional tee to the ideal first shot target position. While dragging, the distance from the tee to the cursor position is populated using measurement units selected in Map properties. Pick the desired target in terrain. For holes with Par = 5 drag the second ideal shot. The last shot from the specified target to green is solved automatically.
Optimal shots definition is optional and is used only for some types of games for right camera orientation during the game.
Max Rendering Distance – Settings Override Global Value enable to override global map settings for the hole. Use it to optimize rendering quality. If the distance is defined the game will render only the scenery up to this distance what can increase performance (fps) during playing of the hole. Entering of this value is very rare.
Note:
Make sure that item Holes in Visibility Filter dialog (accessible via icon from the toolbar ![]() ) is on, to see the hole boundary curve in top or side view.
) is on, to see the hole boundary curve in top or side view.
Make sure that item Holes in Selection Filter dialog (accessible via icon from the toolbar ![]() ) is on, to be able to select the hole boundary curve in top or side view.
) is on, to be able to select the hole boundary curve in top or side view.