
To assign separate texture to each Material Curve type, use Texture Manager command.
You have following possibility to launch Texture Manager command:
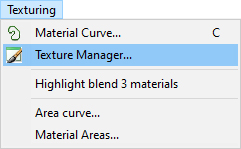
- From Texturing drop down menu select Texture Manager…
- Using icon from the toolbar

Use Texture Manager command to assign separate terrain textures for each Material Curve type. The material curve type is defined by the Material property (Green, Fringe, Fairway…) and Group (A, B, C…). For example, for the material asphalt define 3 groups: A – red asphalt, B – black asphalt, C – green asphalt. The populated texture manager dialog contains a list of all materials defined in the map.
Note:
In a new created map there is only one, the default surface material specified in New Map dialog when opening the map.
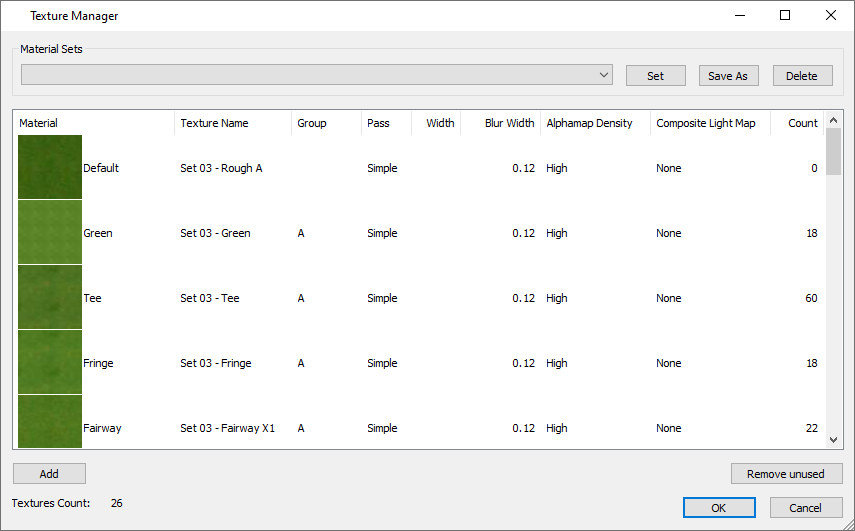
Add – define a new material in the map
Hint:
You can create new material also by drawing a material curve in scene prior to launching of texture manager command. Any material specified while a new material curve is created will automatically appear in texture manager dialog.
Remove Not Used – Remove unused materials. Check values in Textures Count field. If the value for certain material is “0”, in the map doesn’t exists any material curve with the material assigned. Such materials can be removed from the map. (An exception is the Default material, which may be applied to terrain without any material curve.)
Material – Double click in the Material field to open the Library dialog and choose the appropriate material from available materials. The name of the assigned material texture appears in the field Texture Name.
Hint:
One click in the material field highlights all material curves in the map with this material.
Group – Change the group letter to assign a different group to all corresponding material curves.
Pass – From the populated list choose one of the ways of transition from the current material to next, contact material.
Width – For most types of pass a parameter width is adjustable. Click in the width field and write the appropriate value of pass width.
Blur Width – Change width of the pass blur at the border between two materials.
Alphamap Density – Choose aplphamap with High resolution or Low resolution to describe the pass. Low resolution lowers the graphics card memory requirements but the border between two materials is not so sharp.
Composite Light Map – It can be None, Default or Custom. Default is hardcoded preset. Custom setting is configurable through “Composite lightmap setting” dialog.
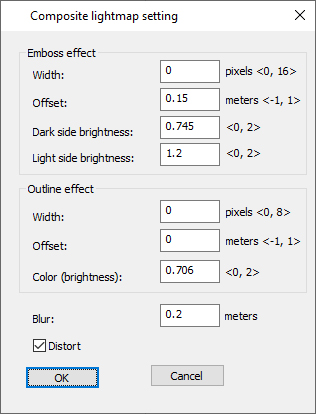
Width – width of emboss effect in pixels. If there is resolution 10px/m, the width is in dm. Enabled values: 0, 1, 2, … 16. 0 switch off emboss effect.
Offset – movement of emboss effect. Positive numbers move outside, negative inside. Offset is in meters and enabled values are in range -1, 1.
Dark side brightness – brightness of dark part. Enabled values are in range 0, 2.
Light side brightness – brightness of light part. Enabled values are in range 0, 2.
Width – width of line in pixels. Also decimal values are enabled. Enabled range is 0, 8.
Offset – movement of outline effect. Positive numbers move outside, negative inside. Offset is in meters and enabled values are in range -1, 1.
Color – line brightness. Enabled values are in range 0, 2.
Blur – width of blue in meters for light map, the same as “Blur Width” for material transition.
Distort – set if distort should be used also for lightmap. Distort is defined by “Pass” and “Width” setting.
Emboss effect – simulate lighting on bunker walls. It is not right model because it is not computed according real geometry but according material curve. But it is nice 3D effect for make bunker depth more visible.

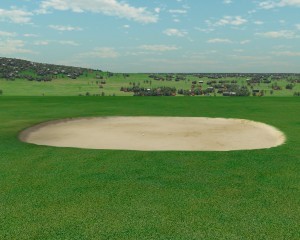
Outline effect – simulate dark wall of bunker. It is uniformly dark on whole bunker boundary.
Another items in Texture Manager dialog:
Count – shows number of material curves in the map, which have the material assigned.
Hint:
Click once in the material field to highlight all material curves in the map with corresponding material and group.
Confirm changes in the texture manager dialog by clicking OK button. When any change of material properties is detected, the dialog “Changes need rebuild of texturing” follows:
- Click Later to postpone applying of changed materials. All material changes are stored, but not applied on terrain yet. Use Update Map > Apply materials to Terrain to apply materials later.
- Click Preview to see how changed material textures look like. Preview applies current material textures only, pass and blur settings are disregarded. The result is achieved faster but not in the final quality. Use later Update Map > Apply materials to Terrain to obtain the final quality.
- Use Apply to apply current materials settings to terrain.
Save As – Create a material set to reuse it in another map. In populated Save Set dialog fill the name for the new material set and click OK.
After saving of the map file the set of selected materials with the specified name will be created. It becomes available in Texture Manager in Material Sets list in other maps.
Set – Apply materials from a material set created in another map. From Material Set drop down list select material set you would like to use and click the Set button. Map materials of same type and group like materials in set will be replaced, other map materials stay unchanged.
Delete – Remove a material set. From Material Set drop down list select material set you would like to remove and click the Delete button. The selected material set will be removed.